Showing posts with label aga. Show all posts

Monday, 7 December 2015

Winter is here, Barley Broth to comfort and sustain!

The start of December and snow lies all around, not deep and crisp and even but sparse and slushy and slippy!  We have had two snow falls in the last fortnight here in west Aberdeenshire but so far the temperature has still been warm and to my delight the garden and polytunnel are still yielding produce for us.  I spent a few minutes rooting around the other day and picked enough to make a big pot of broth, one of our family favourites at this time of year.


I used everything apart from the cavalo nero, which I saved for the next evening's supper.

Ali's Winter Barley Broth


1 tablespoon of olive oil
2 onions 
a Handful of carrots (probably around 3 medium sized ones)
2 sticks of celery
3 leeks
Big handful of parsley
1 cup of barley, soaked overnight in plenty of water
Approximately 1.5 lt/3 pints of chicken or veggie stock (I use homemade)
Some leftover chicken (from the bird used to make the stock, I buy local free range chickens so always use every bit of them)
Salt and pepper to taste


1. Chop the onions, and start by gently softening them in the oil in a large soup pan or casserole.

2. Once the onions have started to become translucent, add the chopped carrots, celery and leeks.  Give this all a good stir and cook away until the pot starts to sizzle.

3.  Add your stock and barley at this stage, followed by as much chopped parsley as you fancy.  Bring everything to a gentle boil.


4.  At this point I pop a lid on the pot and put it in the bottom oven of my Aga for a good hour to gently simmer away.  I don't season at this stage as I always wait until the barley has become soft and toothsome before I do.  On a regular cooker just reduce the heat until you have a low simmer and cook for about the same time, stirring regularly.


5.  The broth is cooked when the Barley has plumped up but still has a bit of bite to it.  This is when I season and then add the pre-cooked left over chicken and bring it all back up to a rolling simmer for about 10 minutes before serving.  We eat this with oatcakes, it will stick to your ribs as my Mum used to say!

I make many variations of this soup, sometimes with lentils, split peas too and depending on what we have in the garden, but I have to say that this version with barley in is my favourite.  Just the thing for the dark and short days we have at this time of year.

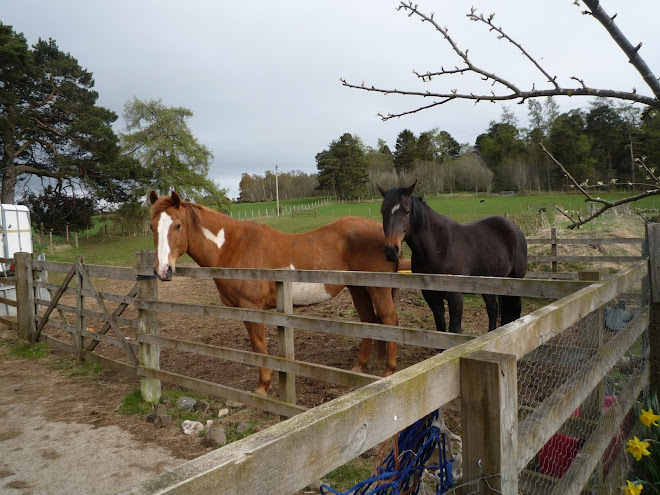
I got this lovely shot of Brooke our Shetland pony coming in for some hay last weekend.  I am trying to keep the horses out this year, as we now only have one 'big' horse, Brea, and two little ones, Brooke (above) and the even smaller MissyBell who is an American Miniature Horse.  As the herd are all getting on a bit I'd rather they keep moving, eating ad lib hay whenever they want than stay in stables at night, however, the condition of our fields and quantity of mud is always the deciding factor.  I much prefer cold, sunny and frosty weather and I think the horses do too!

Wondering if this will be my last post for 2015?  Perhaps it is, but I hope to return more regularly in the New Year.

Wishing you and yours all the very best for the festive season and a happy and healthy 2016 to us all!

Ali
x

Tuesday, 27 November 2012

Whisky & Ginger (Marmalade) Fruit Loaf

This is a wonderful recipe, perfect for all times of year and especially around Christmas.  The joy of this Whisky Ginger loaf is that you make two at a time, I usually freeze one and then the other can be eaten.  Alternatively you could freeze both as they keep beautifully, but only if the rest of your family haven't realised you have baked them! (the smell as they come out of the oven is too good to miss).

The recipe is adapted from the orignal recipe taken from 'The Three Chimney's' cookbook by Shirley Spear.  Still on my wishlist of places to visit and eat, I enjoy cooking from this book which feels like part journal/part travel guide, with truly stunning photos.  *I will include the orginal options in the recipe for information.

INGREDIENTS

You will need;

170g raisins
170g sultanas
140g currants
250 ml water
115g butter
140g soft dark brown sugar
3 eggs beaten
280g self raising flour
2 tsp mixed spice
2 heaped tbsp Ginger preserve (*original uses marmalade)
30g roughly chopped almonds
75g chopped mixed peel
75g chopped crystallized ginger
75g chopped glace cherries* (original just uses 115g of peel and 115g of cherries)
3 tablespoons of whisky

2 x 2lb loaf tins, greased with a bit of butter and lined.  Preheat oven to 180oC (I use my Aga, grid shelf on the bottom of the top oven, cold plain shelf on second set of runners).

METHOD

Weigh out the raisins, sultanas and currants.  Place in a large saucepan along with the water, sugar and butter.

Heat gently until the butter and sugar have melted together and the whole kitchen smells of delicious sweet, warm fruit.  Don't let the mixture boil.


Take the pan off the heat and allow to cool slightly.  Now assemble the rest of your ingredients, and when the fruit mix has cooled, mix through everything else (sieve the flour and mixed spice).


I add the Ginger preserve and whisky last, giving it all a quick stir together to make sure everything is mixed through.


Split the mixture between two greased and lined 2lb loaf tins (I don't have two the same size but it doesn't seem to matter).  Bake for about 1 hour, the finished cake should be lovely and brown.


Out of the Aga!  Leave the cakes to cool in their tins for about 30 minutes before putting on a wire rack to cool.  My Aga was quite hot when I baked these, so they only took 50 minutes and the one in the silicon 'tin' is slightly over (well lets say a bit more caramelised!!).  But it still tastes delicious.  Keep in an airtight tin until ready to use or wrap well and freeze (defrost thoroughly before using).

The finished Whisky Ginger loaves


Thursday, 5 April 2012

Hot Cross Bun (Bread) and Butter Pudding just in time for Easter

I made this last week and enthusiastically tweeted about it, promising to post the full recipe and photos on here later that day (ahem!).  So here we are a week or so later.  Anyway, life has been busy I've finished painting the outside of my stables, we've been planting up plants in the greenhouse ready for planting out later and Paul has been getting on with the new deck outside.  Spring really felt like it was springing, until this Monday when we had a slight dusting on snow and then on Tuesday 3rd, my Dad's birthday, he was up visiting from Glasgow, we woke up to 7 inches of snow.  Winter not quite ready to let go of us yet!   It was sad to see our tiny narcissi daffs flopped over underneath the snow but hopefully it will warm up again soon (-2oC when I woke this morning).

Hey ho, back to the task in hand.  Here is my recipe for a bread and butter pudding made with slightly stale hot cross buns, it was truly delicious.  This recipe is not terribly sweet as I served it with Vanilla ice cream, if you prefer a sweeter pudding I would add a couple more tablespoons of caster sugar in the custard mix.

You need;


6 hot cross buns;
softened butter (enough to spread over the bread and grease the dish);
6 fl oz double cream;
6 fl oz milk;
2 tablespoons caster sugar;
3 large eggs;
2 tablespoons brown or demerara sugar.

Preheat oven to 180oC - I baked in Aga, shelf on the bottom of the top oven, plain shelf on the 2nd set of runners.

Slice up the buns, across the way.  Butter both sides and layer in a buttered dish.


 Combine the cream, milk, eggs and caster sugar - mix well in a jug.


There is almost a pint of custardy mix.  Pour this over the buttered buns in your baking dish. 


Finally sprinkle brown sugar over the top and bake for around 35 minutes in a moderate oven.


Remove from the oven, leave to cool for about 5 minutes, then serve with your choice of ice cream, custard, double cream or all 3!! 

The finished pudding - and very delicious it was too.  Happy Easter everyone!

Thursday, 2 February 2012

It's February and it's fantastic!

Hurrah! it really feels like the days really are getting longer now.  The first snowdrops have appeared in the garden and with the nice (cold but not too cold and no snow!) winter we are having we've managed to get on with quite a few jobs around the garden.  Including completely clearing out our greenhouse and managing to lay slabs completely covering the ground inside it too, this means we will just use the deep beds inside the polytunnel for growing beans etc in and use the greenhouse for stuff in containers and seeds etc.

I'm making marmalade, again, I make my own every year.  I love when we get Seville oranges in the shops, their gorgeous smell of sunshine and Spain really lift my spirits.  This recipe is from a very old book I have called the Complete Book of Home Preserves - by Jill Nice and the Woman's Institute.  The recipes in it never fail and if you grow a lot of your own soft fruit, tomatoes etc it's well worth seeing if you can get hold of a copy, I really recommend it!

Not quite marmalade yet!


Seville Orange Marmalade

1 kg Seville oranges
1 lemon
2 kg white sugar
4 pints water

(8 or 9 hot, dry, sterilized jam jars - I wash mine in the dishwasher then pop them in the bottom oven of my Aga and take them out just before filling)

Wash all the fruit, using a large dish or bowl slice the fruit up thinly, or chunkily (depending on how you like your marmalade - as you can see mine is pretty random, I like the chunks!).  Collect all the pips and tie them into a muslin bag or pop them in a spice ball/strainer (what I do).  Put the pips, fruit and water in a large bowl, cover and leave to stand for 24 hours (as above). 

When ready to make, transfer the soaked fruit etc to a preserving/jam pam and simmer gently until you have reduced the contents by half (the peel should be soft and transparent by now).  Meanwhile put your sugar in a dish and warm it through (I put mine in the bottom Aga oven).  Once the contents are reduced add the warmed sugar and stir until it is dissolved.  Now bring the marmalade back to boil and boil hard until you have obtained a set. I start testing after 5 minutes, I put a pile of saucers in my freezer, if I think the marmalade is almost set I take a saucer out, (take the marmalade off the heat while you are doing this) pour a spoonful of marmalade on the saucer and after about 30 seconds if you can push a clean finger through the marmalade and it leaves a gap then it is done.

Take the marmalade off the heat and leave to stand for 10 minutes before potting (this stops all the peel sinking to the bottom of the jars).  I use a soup ladle and a jam funnel as I'm very clumsy when it comes to this sort of thing and have ended up with marmalade everywhere before!

This recipe gives a dark, chunky marmalade which has that background bitterness which I love, if you want to pep it up a wee bit try adding 2 tablespoons of whisky to the marmalade just before removing from the boil and stir well - I suppose you could use Brandy or Rum too, but I like whisky so Whisky Marmalade it is for me.


Thursday, 24 November 2011

My Mum, Irene's Sultana Cake

Yesterday, I made a sultana cake, following the recipe of my Mum's that I've used ever since I left home.  My Mum's sultana cake was famous in our family, she used to make quite a few, sometimes to give to friends and relatives or perhaps for her church sale but mostly she made it for my Dad as it was his favourite cake.  Always made at Christmas, you couldn't have a cup of tea or coffee in Mum's house around Christmas or Hogmanay without getting a piece of her wonderful sultana cake, so buttery and delicious, I had cousins who used to drop by specifically to get a piece of cake and perhaps be sent home with some wrapped in foil!

The last time my Mum made this cake was January 2nd 2009, I had just arrived at  my childhood home in Glasgow as my father had been admitted to hospital with pneumonia over Christmas.  I had driven for 4 hours  to stay with Mum and visit him.  As I walked in the door the wonderful smell of sultana cake greeted me like a blast from my childhood.  Mum was going to take some into hospital for Dad as she had been worrying that he wasn't eating enough.  She had struggled making the cake she said, the fingers on her left hands were stiff and not working properly - she mentioned going to see her doctor as she thought she perhaps had a trapped nerve or maybe her osteoarthitis was playing up.  That was the last sultana cake she ever made, she was admitted to hospital four weeks later with a suspected stroke but sadly diagnosed with an incurable Glioblastoma multiforme brain tumour.  She passed away in December 2009 before the next Christmas.

Like my Mum, I too have always made sultana cake every Christmas, I make a proper full-on Christmas fruit cake every year as well, as that is my husbands favourite, but for me nothing beats a piece of Mum's cake.  I decided to blog this as a small tribute to my Mum whom I miss terribly - she was the most generous, loving and caring women ever and I think she would approve of me sharing her recipe and the love that went with her cake.

Irene's Sultana Cake
Ingredients ready!

1lb Plain Flour
10oz Caster Sugar
1tsp baking powder
12oz Butter (softened)
12oz Sultanas
4 eggs
1 or 2 tbs milk

Grease and line a 8" diameter round cake tin, mine is
3" deep.  Mum used to line hers with brown paper
too - but I don't bother.
 
Cream the butter and sugar until light and fluffy.


a LOT of butter - not for the faint hearted!

Cream butter and sugar

Add the eggs to the creamed mixture one at a time, beat in well (I add a tablespoon of flour between eggs to prevent curdling).


Add eggs - one at a time

Now add the flour and baking powder


Once the eggs are mixed through, add the flour and baking powder (I always sift mine together first).

Now fold in the sultanas, adding 1 or 2 tablespoons of milk to the mixture depending on how moist the batter is.  It should be nice and firm but not dry.

Sultana's in

Spoon into tin


Spoon into your prepared cake tin, smooth out the top and then use the back of a spoon to make a small well in the middle of the mix (this stops the cake over rising and splitting at the top).


Into trivet

then into Aga Cake Baker - and into the top oven


Bake in a pre-heated oven for 1 - 1.5 hours depending on your oven.  My Mum used to put the cake in an oven at 200oC for the first hour, then lower the temperature to 170oC and continue to cook for another 40/50 minutes.


Just out the Aga

Yum - Mum would be proud

The cake is ready when a skewer comes out clean, remove from tin and leave to cool on a wire rack.  This cake freezes beautifully too, perfect for stocking up before the festive season.

I have a 2-oven traditional Aga, I use the Aga cake baker, which preheats on the floor of the roasting oven while I'm making the cake.  Then the cake is put in the trivet and placed in the cakebaker, lid on top and then baked in that oven for 1 - 1.5 hours.  I always check my cake after about an hour, if my Aga is hot in the morning I find the cake only takes 1 hour and 15 minutes.

For my darling Mum, Irene - love you Mum and miss you so much x


Wednesday, 5 October 2011

Apricot and almond biscotti - quick and easy

My phone chirped and the text from my friend read "got some free time this morning, are you home? I'd love to drop round for coffee".  Fantastic, I replied and then realised that I didn't have anything to offer to eat with the coffee, I'd been stuck at home all week due to a balance disorder and couldn't drive.  Raking about the cupboards I discovered some semi dried apricots and almonds - and inspired by a beautiful Australian friend of mine who is an amazing baker and always makes her own biscotti I decided to give them a go.  They turned out a bit burnt on the edges (probably down to my Aga being hot in the morning) but are absolutely delicious, and I got them made in time for me and my friend to have with our coffee.


Ingredients;

1 cup plain flour
1/2 cup caster sugar
1 tsp baking powder
1/2 cup flaked almonds
1/2 cup chopped dried apricots
2 eggs beaten

Mix the dry ingredients together, then slowly blend in the eggs until you get a sticky wet(ish!) dough.  Turn the dough out onto some floured parchment paper on a large (I use the large Aga roasting tin) baking tray.  Shape it roughly into a large sausage shape (if you would rather have daintier biscotti you could split the dough into two log shapes and follow the rest of the recipe as normal) - bake for about 20/25 minutes in the bottom of the top oven of the Aga (around 180oC) in the Aga you may need to put the cold plain shelf above it (depends on how hot your Aga is). 

Once baked, remove from the oven and then allow to cool.  Using a very sharp knife, slice the huge biscuit loaf into thin strips (about 5 mm thick?) - then spread the now sliced biscuits out on a baking tray (I needed to use another tray too!) and bake for 20 minutes, this time in the top of the bottom oven of the Aga (140oC?) turn them half way through cooking and ensure that they are drying out nicely.  Once baked remove from the oven and leave to cool on a wire rack.

Absolutely delicious - especially dunked in a lovely cup of coffee.

*please note that I have a traditional two oven Aga, not one with a special baking oven.  Each oven varies so the temperatures I've given may need to be adjusted.

Tuesday, 8 March 2011

Pancake Day

My recipe for the best ever pancakes - these are what some people call drop scones, Scotch pancakes or gridle cakes - but they are the ones we like best in this house - they are thick and fluffy a bit more like the pancakes or hotcakes we used to get for breakfast in Canada.


200g self-raising flour
50g caster sugar
2 eggs
1/2 pint of whole milk (or buttermilk)
pinch of salt

(makes around 15 large-ish pancakes)

Put the flour and sugar in a bowl, beat in the eggs and milk until you have a thick custardy batter (add your pinch of salt).  I cook these on the simmering plate of my Aga, but you can use a thick bottomed frying pan, lightly grease with some vegetable oil.  Pour on your pancakes - make them whatever size you like, about 15cm in diameter is everyone's favourite size in our house.  Watch them cook until the bubbles in the batter around the edges have started to pop, then flip them over with a metal spatula (no throwing these ones in the air).  Cook on the other side for a few minutes, then transfer to a warmed dish or a clean teatowel while you make the others. 

I sometimes put fresh blueberries in the batter too.  Serve with fruit, bacon and maple syrup for brunch or with jam and butter for tea-time.

Thursday, 2 December 2010

Christmas Cake and SNOW!

Wow - what a completely mad end to November, beginning to December!  We have now spent a week with sub-zero temperatures and heaps (about 16 inches!) of snow.

A couple of weeks ago I started to make my Christmas cake.  I use a recipe from a Good Housekeeping AGA winter cook book, you cook the cake overnight in the bottom oven of the Aga.  Although this year I made a few (!) mistakes with the recipe!
 I got a bit over enthusiastic with the chopping and soaking of the dried fruit and put the cherries, peel and brazil nuts in with the rest of the fruit to macerate overnight in port and Cointreau - I'm really hoping it won't affect the taste of the finished cake.

It looked (and smelled) ok once it had finished baking, and I'm now 'feeding' it with brandy once a week up until the week before Christmas when me and the kids will ice and decorate it.

Meanwhile - outside we are living in a winter wonderland!  Snow hit the North East of Scotland last Thursday, 25th November and hasn't really stopped since.   Schools are all shut so we have all been stuck at home, thankfully my husband can work from home so he's been able to help with getting water out to the animals, clearing paths and bringing in logs etc!!

They say a picture conveys a thousand words - so I'll post the next few photos and let them speak for themselves.

View across the glen

Keeping the horses water filled up

Zac, Brea and Poppy

Robin in the stables

Garden - what garden?

Hard to believe that we'll ever see anything green in the garden again when everything is so white outside. Still counting our blessings that we have all our hay in for winter feeding, and our logs are all chopped and stacked to keep us nice and cosy inside.  I am really wishing I had heated waterers like the ones we had for the horses when we lived in Canada, but apart from that it is so beautiful outside and getting us all in the mood for a lovely Christmas holidays - time to get the skis out I think.

Saturday, 29 May 2010

Tortilla - (Spanish Omlette) with my wild garlic


This is one of my favourite dishes to make, not only does it taste good, but there are times in the year when everything I use is from the garden - eggs from our hens, potatoes and onions.  Decided to add some wild garlic as we've got tons this year.

Started off by lightly frying one large onion, sliced, until soft in olive oil. Next added steamed baby potatoes (used Jersey Royals which are in season right now) roughly crushed the potatoes, then gently mixed through the onions.  Added salt and pepper and continued to fry for a bit.


Next, I beat up some free range eggs (I used 13 from our own hens - this fed 5 of us with leftovers).   Added the eggs to the pan and gave the pan a shake  to make sure the egg seeped through the potato and onions.

I washed and sliced a large bunch of wild garlic leaves, (saved the stalks, chopped them up finely and chucked them in a chorizo & chickpea warm salad).  Finally sprinkled  the wild garlic on top of tortilla.


Finished off the omlette by putting in the oven to cook through (or under a grill maybe - I don't have one so just put in the top oven of the aga).  Then sprinkled the garlic flowers over the top before serving.

Really good to eat hot and even better to eat cold out the fridge (if there are any leftovers) - is also the perfect hangover breakfast or picnic food.


Tuesday, 27 April 2010

Leftover lunch for a useless Tuesday

Today hasn't exactly gone as planned, went outside (as usual) this morning to give my hens some feed, broccoli stalks and weeds (they are confined to their run at the moment due to next door's cat and both legbars laying somewhere in the garden - yummy for Rosie and Dash our labradors, not for us), afterwards I had planned to meet my husband in town to choose a new carpet for our bedroom (probably more on that later!), of course he was busy so I couldn't get hold of him.
I decided that I may as well go and do some food shopping instead, and started getting ready to leave the house - no purse!  Pants, where was my purse? (and panic too!), picked up phone to call hubby (again) and there is a message from my hairdressers in Aberdeen (30 miles away) was there something wrong as I had an appointment at 11.15 (it's now 11.30!) - double pants, phone them back and apologise for completely forgetting about it, next appointment is in three weeks time - by which time I'll look like my Welsh Sec A pony!!!  Anyway, call to hubby is made, he found my purse in his car - so now I'm stuck, I tell him I may as well just go and lie in a darkened room......

However, I log onto to twitter instead and catch up with what's happening and see a post from a fellow blogger who I follow.... and it's all about food, lovely food and tea-flavoured cocktails and biscuits (I highly recommend following The English can cook) now I'm hungry and find some leftover filo pastry from last week's spinach pie and leftover tomato and mozarella salad from Sunday's dinner - excellent, the day has been redeemed!


Leftover Tuesday pie

some sheets of filo pastry
melted butter
leftover tomato salad (tomatoes, basil, mozeralla and good balsamic vinegar)
black pepper


Brush the sheets of filo with the melted butter and use to line a individual sized pie dish (I used about 4 sheets). Put in the salad and season with black pepper. Brush any left over filo with butter and then scrunch up to make the top of the pie (you just wodge it all in, it will look better once it's baked). Pop into a preheated oven (my aga is always on so I just put it on the bottom of the top oven - probably around 180oC?) - cook for 15/20 minutes until brown.


Eat straight from the pie dish - minimal washing up!

Eat and enjoy and feel as if the rest of the day can continue!