Friday 3 February 2012

Stuff that works for me in cold (baltic) weather!

Another very cold and absolutely freezing day today!  However, the sunshine and clear blue skies make up for the fact that it's still -6oC at 10.00 am.

Having kept animals at home for the last ten years I have found the following things really help when we hit the 'very cold' part of winter.  This year hasn't been so bad so far, last year our lowest temp was -27oC and we stayed at below -20oC for a week.  All this is fine for us humans, central heating, an Aga, a couple of log burning stoves and even some electric fan heaters kept us warm inside but dealing with our horses and chickens outside was more challenging.

Here is my list -
  • Musto snug jodpurs - warm legs and happy me
  • Muck boots - these are neoprene wellies, and keep your feet warm and dry (but they do really stink when you take them off, I Febreze mine and my OH's!!)
  • I have two galvanised waterers for our chickens - one is always defrosting/defrosted inside the house, ready to be swapped over for the outside one once it freezes (and this can happen a couple of times a day if it's -20!)
  • Last year we finally bought and fitted a heatsource tape to the water pipe that supplies my stables - it has a built in thermostat which automatically heats the length of blue water pipe if the temp drops below 3oC.  It means that I can fill the horses water buckets in the stable and also outside without having to fill containers from the house and move to the stables/field by wheelbarrow.
  • I now use large Tub Trugs as water buckets in the horses stables and in my fields (especially as my automatic waterer freezes solid pretty quickly).  They are easy to remove the ice from and flex a bit if they get frozen solid.
  • I use a kids (clean) shavings fork to lift ice out from the buckets before I refill them with water - bit basic but stops the water freezing again so quickly.
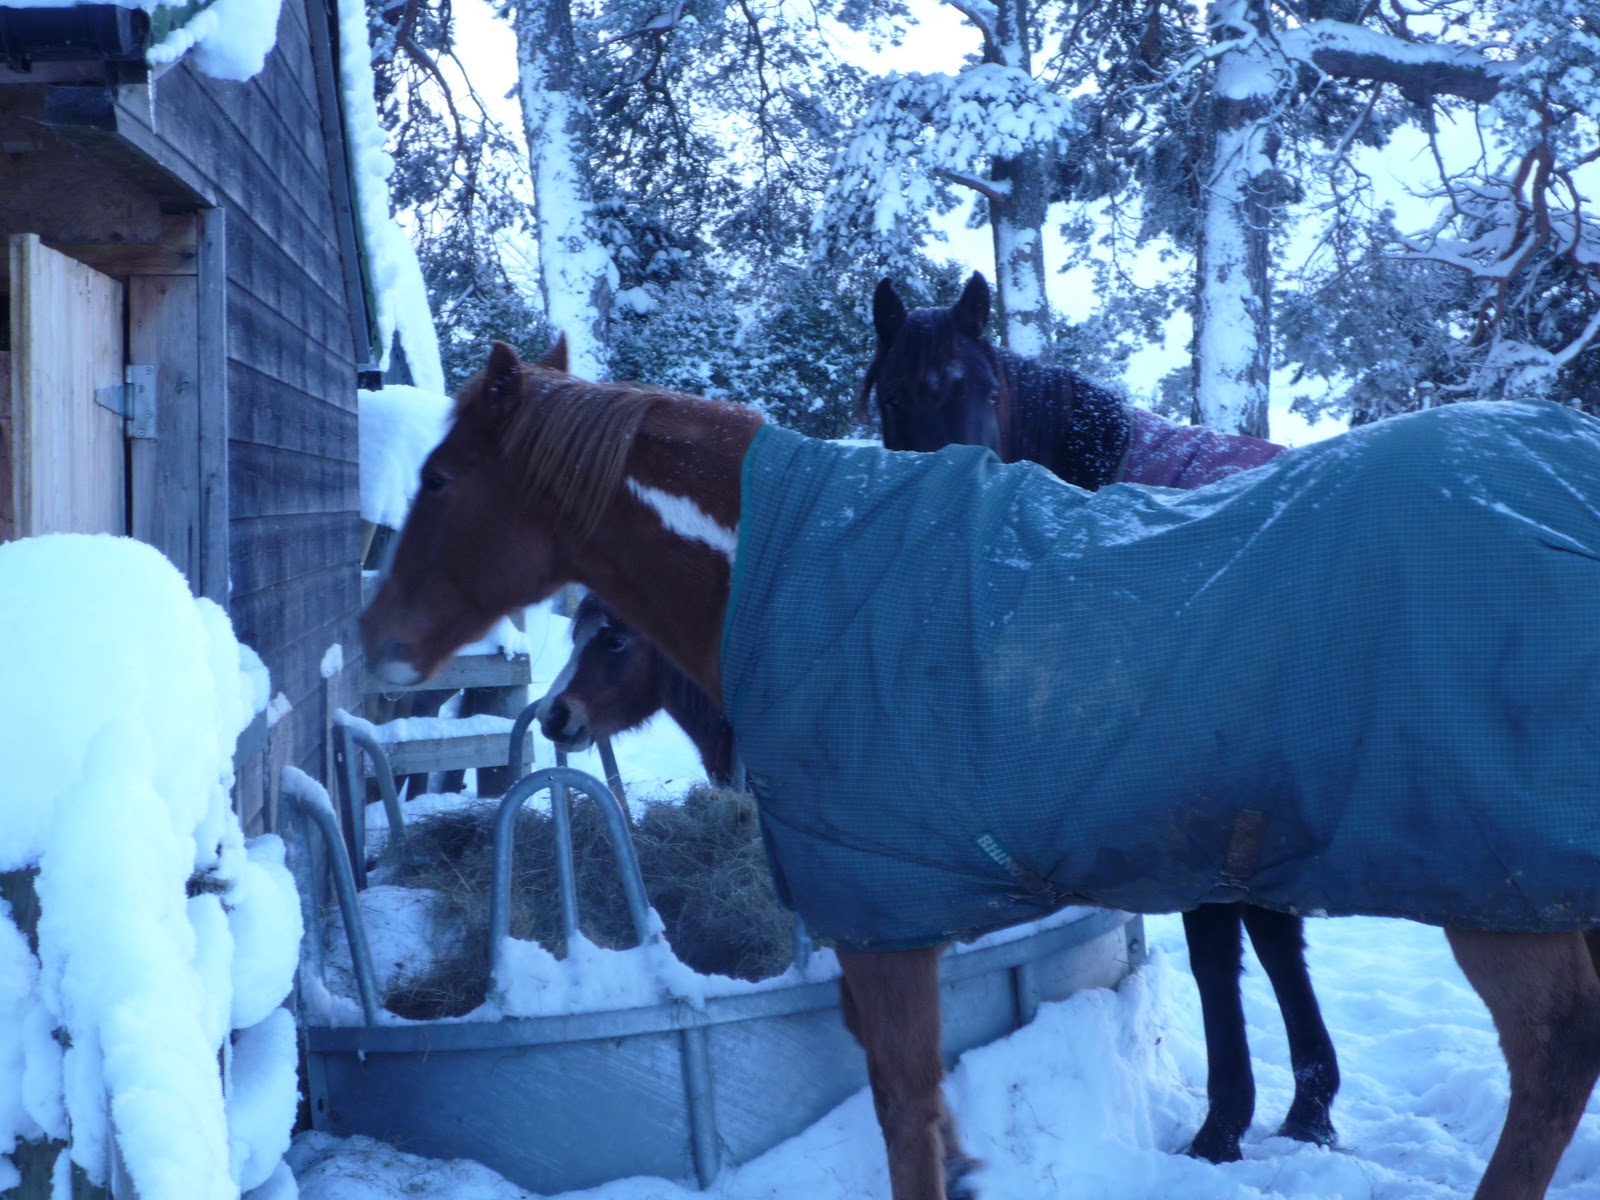
  • We have a section of hardstanding in our paddock nearest the stables, I feed the horses hay from a round (Highland Cattle!) feeding ring there, it stops them standing in mud and means I don't have too far to go to move hay.
  • When the temp is really cold, I feed the horses in their stables, do rug checks etc etc and then I leave the stable doors and the gate to the field open.  This means they are free to come and go as they please.  My two big horses moved home with us from Calgary, Alberta and are used to cold temperatures, but I have found on really cold nights that they keep warmer if they can move/walk around rather than standing in a loose box all night.  This seems especially true with Zac, my paint horse, he is around 24 years old and is quite stiff in his pelvis so keeping moving is much better for him.
  •  I keep a chicken feeder filled up with layers pellets under a small weather shelter at all times.  The chickens also get two poultry corn feeds a day, and an extra feed of grain at night just before roosting.  My theory is that this keeps them a bit warmer when they are roosting!
  • We have a automatic pop hole opener on our chicken house, which is great, but sometimes if there is a lot of snow I dig small paths for the chickens to go from their house, to the water, to the feeder etc.  A sprinkling of hay outside their door can help them jump down, they don't seem to like the initial shock of going onto cold snow.  We just rake it up again once the hay has gone. 

A list of simple things, but they mean I can look after my animals, even when it does feel like we're in a freezer outside.

Thursday 2 February 2012

It's February and it's fantastic!

Hurrah! it really feels like the days really are getting longer now.  The first snowdrops have appeared in the garden and with the nice (cold but not too cold and no snow!) winter we are having we've managed to get on with quite a few jobs around the garden.  Including completely clearing out our greenhouse and managing to lay slabs completely covering the ground inside it too, this means we will just use the deep beds inside the polytunnel for growing beans etc in and use the greenhouse for stuff in containers and seeds etc.

I'm making marmalade, again, I make my own every year.  I love when we get Seville oranges in the shops, their gorgeous smell of sunshine and Spain really lift my spirits.  This recipe is from a very old book I have called the Complete Book of Home Preserves - by Jill Nice and the Woman's Institute.  The recipes in it never fail and if you grow a lot of your own soft fruit, tomatoes etc it's well worth seeing if you can get hold of a copy, I really recommend it!

Not quite marmalade yet!


Seville Orange Marmalade

1 kg Seville oranges
1 lemon
2 kg white sugar
4 pints water

(8 or 9 hot, dry, sterilized jam jars - I wash mine in the dishwasher then pop them in the bottom oven of my Aga and take them out just before filling)

Wash all the fruit, using a large dish or bowl slice the fruit up thinly, or chunkily (depending on how you like your marmalade - as you can see mine is pretty random, I like the chunks!).  Collect all the pips and tie them into a muslin bag or pop them in a spice ball/strainer (what I do).  Put the pips, fruit and water in a large bowl, cover and leave to stand for 24 hours (as above). 

When ready to make, transfer the soaked fruit etc to a preserving/jam pam and simmer gently until you have reduced the contents by half (the peel should be soft and transparent by now).  Meanwhile put your sugar in a dish and warm it through (I put mine in the bottom Aga oven).  Once the contents are reduced add the warmed sugar and stir until it is dissolved.  Now bring the marmalade back to boil and boil hard until you have obtained a set. I start testing after 5 minutes, I put a pile of saucers in my freezer, if I think the marmalade is almost set I take a saucer out, (take the marmalade off the heat while you are doing this) pour a spoonful of marmalade on the saucer and after about 30 seconds if you can push a clean finger through the marmalade and it leaves a gap then it is done.

Take the marmalade off the heat and leave to stand for 10 minutes before potting (this stops all the peel sinking to the bottom of the jars).  I use a soup ladle and a jam funnel as I'm very clumsy when it comes to this sort of thing and have ended up with marmalade everywhere before!

This recipe gives a dark, chunky marmalade which has that background bitterness which I love, if you want to pep it up a wee bit try adding 2 tablespoons of whisky to the marmalade just before removing from the boil and stir well - I suppose you could use Brandy or Rum too, but I like whisky so Whisky Marmalade it is for me.